The Best Way to Polish Wine Glasses: A Master Sommelier’s Guide to Streak-Free Shine
Imagine this: You have carefully selected a vintage Cabernet, decanted it for an hour, and prepared a beautiful steak dinner. You pour the wine, lift the glass to the light to admire the color, and… spots. Cloudy water marks, lint, and a greasy fingerprint right on the bowl. In an instant, the elegance of the moment is tarnished.
Clean glassware is not just about aesthetics; it is a critical component of the wine-tasting experience. Residue from soap can kill the bubbles in Champagne and alter the aromatics of a delicate Pinot Noir. Dust affects the palate. If you have invested in high-quality wine glasses, maintaining them properly is non-negotiable.
In this comprehensive guide, we will teach you the best way to polish wine glasses without breaking them. We will cover the professional steam method used in Michelin-star restaurants, how to tackle hard water spots and cloudy film, the specific cloths that ensure a lint-free finish, and how to handle everything from thin-blown Zalto crystal to everyday glass. This is the only polishing guide you will ever need.

Why Polishing Changes the Taste
You might think polishing is purely cosmetic, but it impacts the sensory experience of wine in two major ways:
1. Visual Appreciation
Wine tasting begins with the eyes. We assess the age of a wine by its rim variation — the color gradient from the center of the glass to the edge — and its health by its clarity. A cloudy or spotted glass obscures these details entirely. A wine that appears amber-tinged at the rim signals age and oxidation; a bright ruby core signals youth and vibrancy. You cannot read any of this through water spots. If you are learning to assess wine properly, understanding wine terminology is key, and visual clarity is the starting point of every assessment.
2. Aromatic Purity
The biggest enemy of wine aromatics in the glass is detergent residue. If a glass isn’t polished and rinsed correctly, a thin hydrophobic film of soap remains. This film can flatten the mousse (bubbles) in sparkling wines almost instantly. The chemical smell of lemon-scented dish soap interferes dramatically with the delicate bouquet of a Pinot Noir or a floral Riesling. Polishing removes this film completely.
3. Nucleation and Bubble Formation
This is the detail that separates casual drinkers from true enthusiasts. Champagne and sparkling wine bubbles form at tiny imperfections on the interior glass surface called nucleation sites. A perfectly clean, polished glass has fewer nucleation sites — and produces elegant, fine, slow-rising bubbles. A dirty or etched glass produces large, coarse, fast-rising bubbles that dissipate quickly. The visual elegance of a well-poured Champagne is directly linked to the cleanliness of the glass. Read more on this phenomenon in our guide to Champagne flute vs coupe bubbles and aroma.
The 3 Golden Rules of Crystal Care
Before you pick up a towel, memorize these rules. They prevent the heartbreak of a snapped stem and the frustration of a re-polished glass that somehow looks worse than before.
1. Polish While Slightly Damp
Dry rubbing creates static electricity, which attracts lint and dust particles like a magnet. It also increases friction significantly, making breakage more likely. The glass should always be steamed or slightly moist before the cloth makes contact with the surface.
2. Use Two Cloths at All Times
Your hands have natural oils. If you hold the glass with a bare hand while polishing with the other, you are depositing new fingerprints on the surface you just cleaned. Use one cloth wrapped around the base to hold the glass, and the other to do the actual polishing work. This is standard practice in every professional service environment worldwide.
3. Dedicated Polishing Cloths Only
Never wash your polishing cloths with regular household laundry. Fabric softeners and dryer sheets leave a chemical coating on the cloth fibers that transfers directly to your glass on the next polish, causing streaks and introducing chemical smells. Wash polishing cloths separately in hot water with a fragrance-free, softener-free detergent, and air dry them.
Essential Tools for Polishing
You do not need expensive machinery, but you do need the right materials. Using the wrong cloth is the most common mistake home wine enthusiasts make.
- Microfiber Polishing Cloths: Look for “lint-free” and oversized cloths. The bigger the cloth, the better — you need enough fabric to wrap the bowl comfortably without your hands touching the glass.
- Steam Source: A kettle, a pot of boiling water, or a specialized stemware steamer. Any consistent steam source works.
- Stemware Drying Rack: Air drying inverted on a rack prevents water from pooling in the bowl, which leaves a concentrated mineral ring.
- White Vinegar (for mineral deposits): A simple, food-safe acid that dissolves hard water calcium deposits without damaging glass.
- Flexible Flute Brush: For cleaning the narrow bottom of Champagne flutes that standard cloths cannot reach.
- Independent Glass Thermometer: Useful if you suspect your dishwasher’s water is too hot — above 140°F accelerates etching on crystal.

Wine Glass Polishing Cloth Comparison: Which Is Best?
Not all polishing cloths are equal, and the material you choose has a direct impact on the finish you achieve. Here is a detailed comparison of the most common options, from the professional standard to the materials you should never use.
| Cloth Type | Lint Risk | Absorbency | Scratch Risk | Verdict |
|---|---|---|---|---|
| Microfiber (Large) | Very Low | Excellent | None | ✅ Best Overall |
| Linen (Ironed) | Low | Good | Very Low | ✅ Traditional Professional Standard |
| Flour Sack Cotton | Medium | Very Good | None | ✅ Budget-Friendly Option |
| Regular Cotton Terry | High | Excellent | None | ⚠️ Only if No Other Option |
| Paper Towels | Very High | Poor | High (micro-scratches) | ❌ Never Use |
| Regular Dish Towel | Very High | Variable | Low-Medium | ❌ Avoid for Crystal |
| Newspaper | Low | Poor | Medium | ❌ Can Deposit Ink |
Recommended: Large Microfiber Polishing Cloths
The professional sommelier standard is an oversized microfiber cloth — at least 20 x 30 inches. Riedel, Zwilling, and several restaurant supply brands make purpose-built versions. The key specification to look for is “lint-free” and a GSM (grams per square meter) rating above 300, which indicates a dense, plush weave that holds moisture without dripping. Our dedicated roundup of the best wine glass polishing cloths compares all the top options with hands-on testing data.
Traditional Alternative: Linen Service Cloths
Old-school fine dining establishments have always used linen. When freshly ironed, linen has minimal lint and a smooth, close-woven surface that glides across crystal without catching. The drawback is that unironed linen leaves more lint than microfiber, and linen requires more careful laundering. If you prefer linen, iron it on the highest setting before each polishing session.
Professional Tip: Buy two sets of polishing cloths — one for holding/gripping the glass and one for the actual polishing surface. Rotate them so the “gripper” cloth accumulates oils from your hands while the “polisher” cloth stays clean. Replace both sets when they start to show streaks despite proper washing.
The Steam Method (Sommelier Standard)
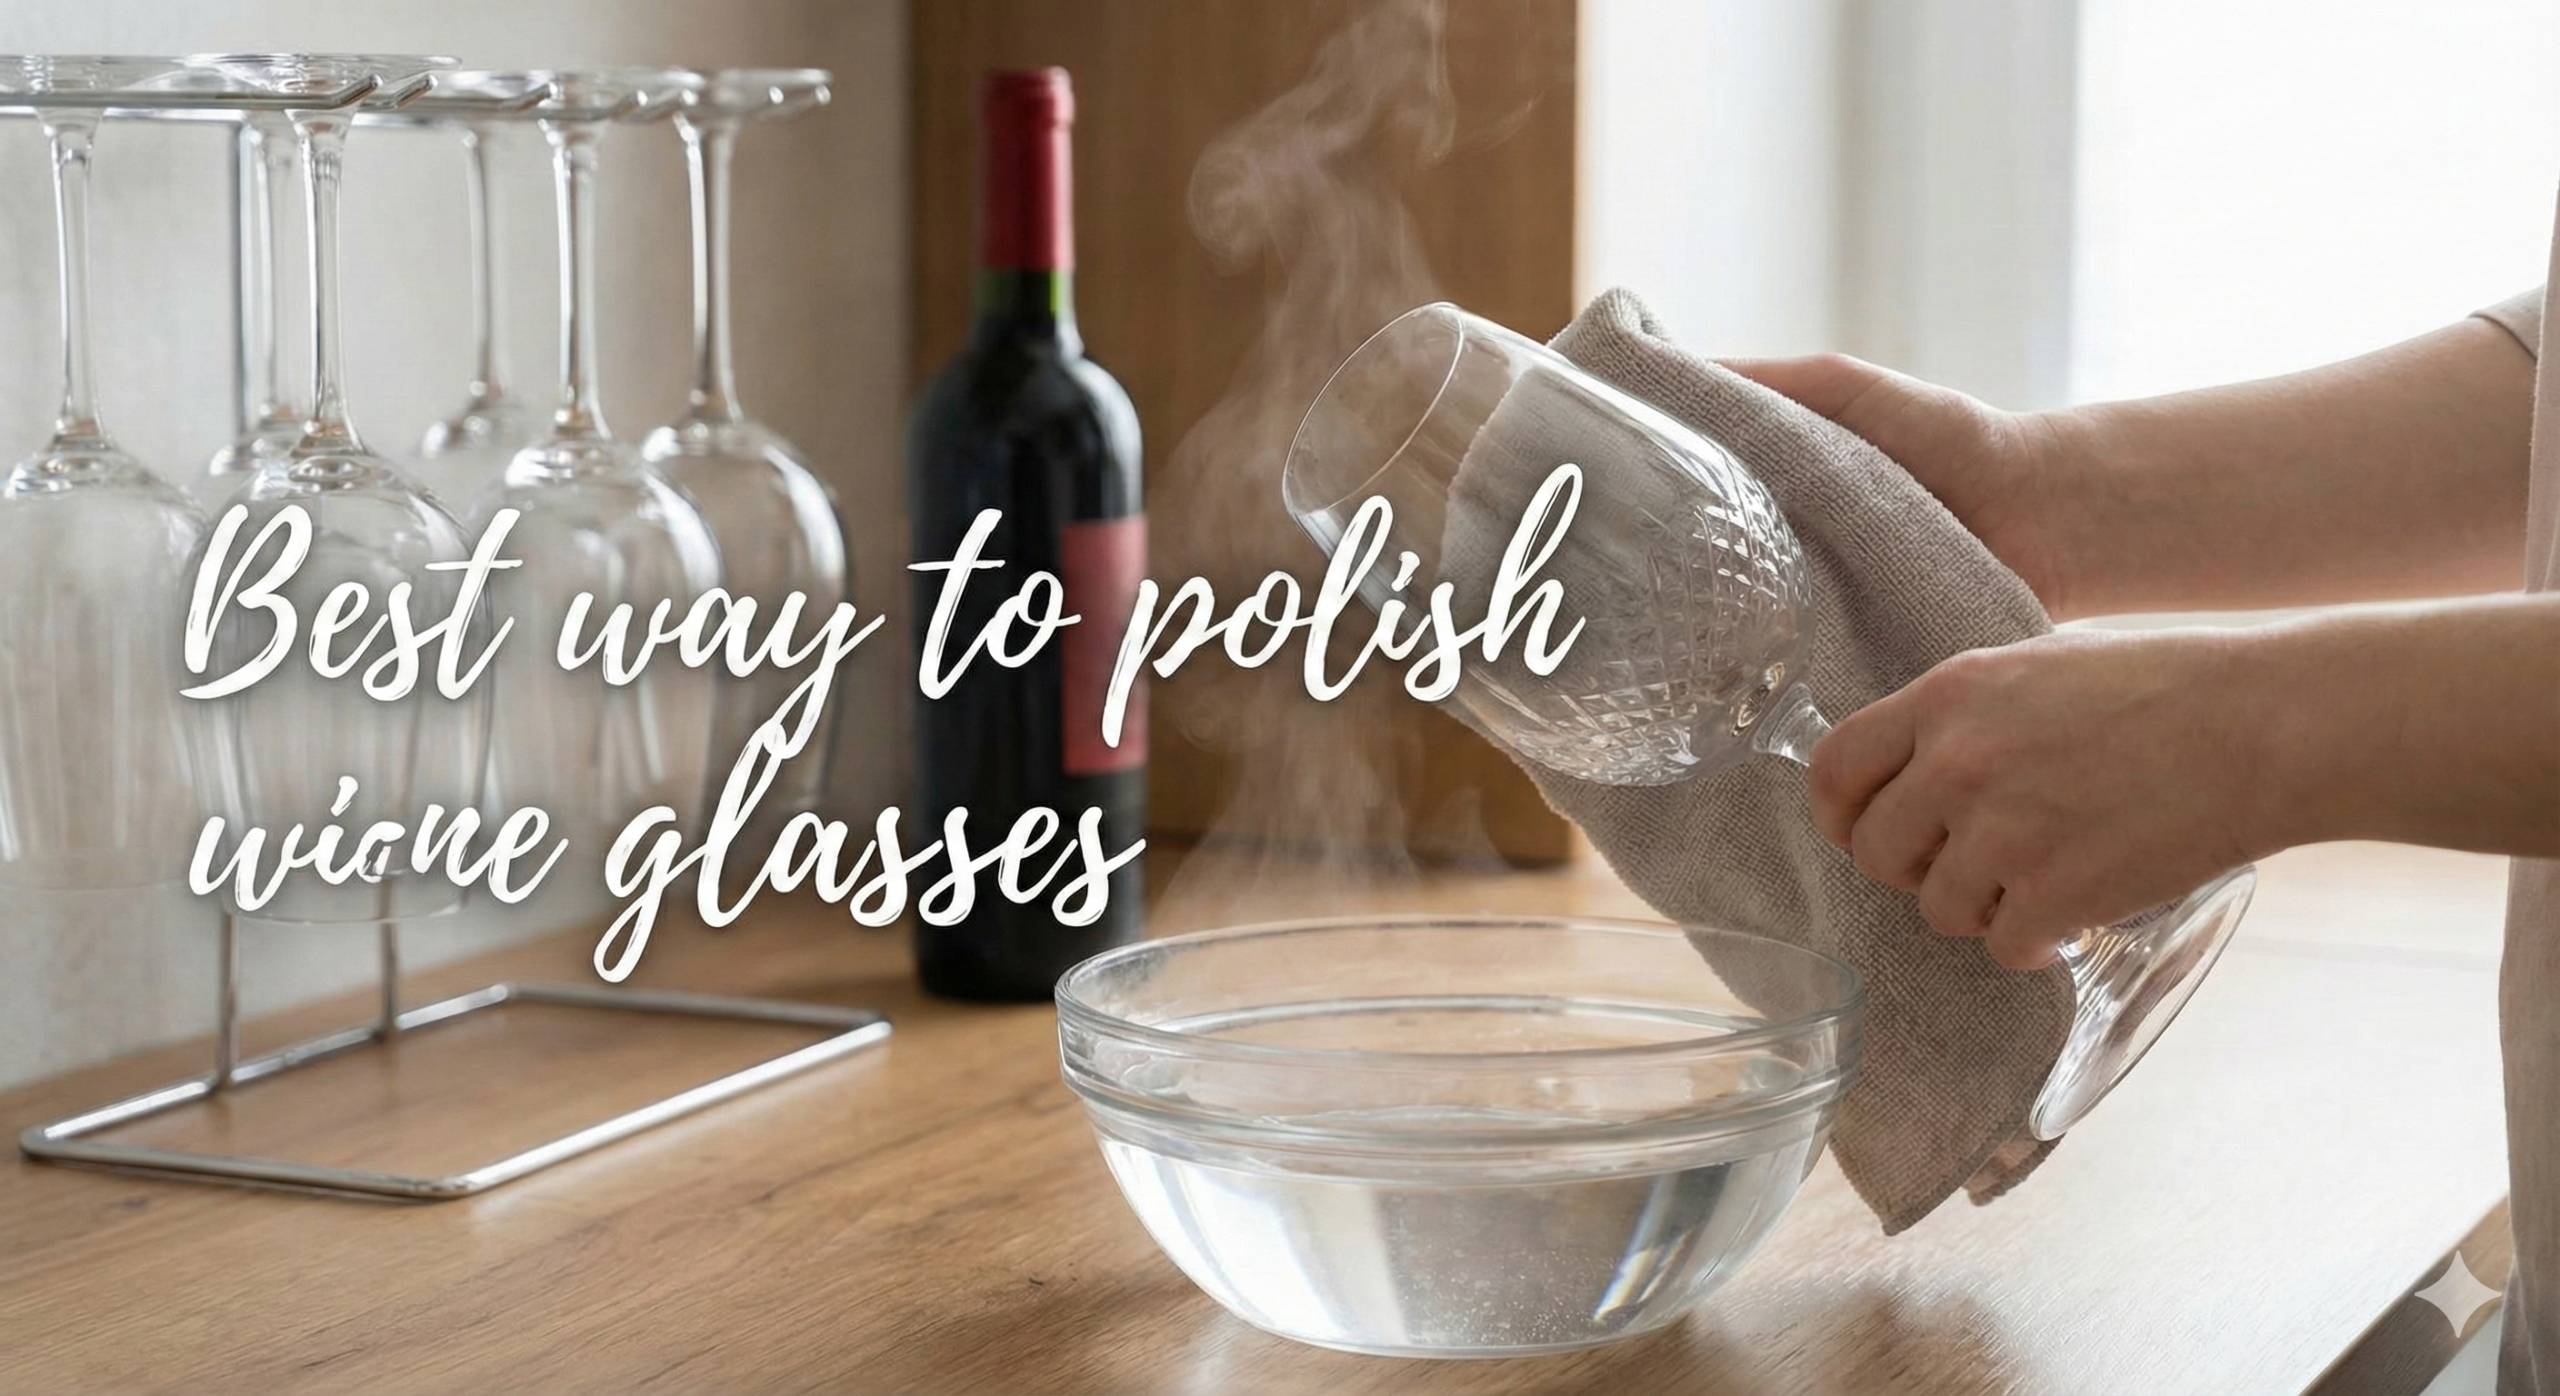
This is the technique used in fine dining restaurants worldwide. It guarantees a spotless finish and works because steam condensate is essentially distilled water — free of the minerals that cause water spots in the first place.
- Wash & Rinse: Wash the glass with warm water (minimal or no soap) and rinse extremely thoroughly. Let it air dry slightly so it is not actively dripping.
- Generate Steam: Bring a kettle or pot of water to a full rolling boil. Hold the glass upside down over the steam for 3–5 seconds. The interior and exterior of the bowl will develop a thin layer of pure moisture. Do not hold it so long that condensation begins dripping into the bowl.
- Polish the Base/Foot: Hold the base with one cloth-covered hand. Use the second cloth to polish the foot of the glass in small circular motions. Work quickly — the moisture evaporates fast.
- Polish the Stem: Gently clasp the stem (not the base!) and run the cloth upward and downward with light pressure. Never hold the base while twisting the bowl — the torque will snap the stem.
- Polish the Bowl (Exterior): Cradle the bowl in one hand covered by a cloth. Use your other hand to apply the polishing cloth in long, gentle sweeping motions from the base of the bowl upward toward the rim. Rotate the glass as you work.
- Polish the Bowl (Interior): Insert your polishing cloth loosely into the bowl. Gently rotate your thumb inside the bowl while your fingers support the outside through the cloth. Never force the cloth into a narrow bowl — use a smaller folded cloth section for narrow flutes.
- The Final Check: Hold the glass up to a bright light source — a lamp or a window — and rotate it slowly. Check for streaks, water spots, and lint. Steam and wipe any remaining marks. A truly clean glass will appear nearly invisible in strong light.
Polishing Techniques by Wine Glass Type
Not all wine glasses are polished the same way. The bowl shape, stem thickness, and glass material all affect technique. Here is a type-by-type guide. For a full overview of which glass serves which wine best, see our guide to kinds of wine glasses and their uses.
Bordeaux / Cabernet Glass
Large, tall bowl with a narrowed rim. The wide bowl is easy to polish inside — insert a loosely folded cloth and rotate from the inside. The tall shape means you need to work in sections: bottom half, then upper half. Check for water rings at the bottom of the bowl where water pools during drying.
Burgundy / Pinot Noir Glass
The widest bowl of any red wine glass. The generous opening makes interior polishing straightforward, but the width means more surface area to cover. Use a large cloth and work in wide, sweeping circles. The wider the bowl, the more likely you are to leave fingerprints on the exterior — keep one hand cloth-covered at all times. Learn more about Bordeaux vs Burgundy glass shapes.
Champagne Flute
The narrowest bowl presents the biggest challenge. A standard polishing cloth is too bulky to insert. Use a slim microfiber cloth folded to a point, or a purpose-built flute brush. Steam the exterior generously and polish the slim bowl by pressing the cloth against the outside while rotating with a fingertip inside. Take extra care — flute stems are among the thinnest and most fragile of any stemware.
White Wine Glass
Smaller bowl than reds, medium-width opening. Generally the easiest type to polish. The smaller interior surface means less cloth is needed inside. The tighter bowl opening can trap steam condensation at the bottom — check after polishing and wipe any pooled moisture before it re-dries and leaves a ring.
Zalto / Mouth-Blown Crystal
Extreme care required. Zalto glasses are engineered to be featherlight — the bowls flex visibly under slight pressure. Use almost zero pressure when polishing. Steam only briefly. Never grip the bowl with force. The reward is extraordinary visual clarity — a polished Zalto is practically invisible in candlelight. Worth every extra second of care. Compare Riedel vs Zalto for help deciding which brand suits you.
Coupe / Dessert Wine Glass
Wide, shallow bowl with no stem complexity. Very easy to polish — the open bowl allows full access with any cloth size. The main challenge is the rim, which is wide and thin and prone to chipping. Always polish from below the rim upward, never pressing down on the rim edge. See our piece on flute vs coupe for the serving tradeoffs of each shape.
Dishwasher vs. Hand Washing
Can you put crystal in the dishwasher? The answer is nuanced and depends entirely on the glass type, the machine, and how you use it.
✓ Dishwasher Is Fine For…
- Machine-made glass (IKEA, standard restaurant glassware)
- Riedel Ouverture or entry-level crystal
- Any glass labeled “dishwasher safe”
- Everyday drinking glasses
✗ Hand Wash Only For…
- Mouth-blown crystal (Zalto, Gabriel-Glas)
- Antique or vintage glassware
- Glasses with gold or platinum rim detailing
- Any glass with a stem thinner than a pencil
Dishwasher Best Practices
If you choose the dishwasher for appropriate glasses, follow these guidelines to minimize etching and breakage risk:
- Use a stemware rack that holds glasses individually and prevents them from knocking into each other during the wash cycle
- Use minimal detergent — roughly half the recommended amount. High detergent concentration accelerates etching
- Select the glass or delicate cycle if your machine has one
- Avoid heated dry — open the door immediately after the cycle and let glasses air dry to prevent water spot formation from steam condensing on the glass
- Check the water temperature setting — above 140°F accelerates chemical etching on crystal
Hand Washing Best Practices
For delicate crystal, hand washing is always safer. Use warm (not hot) water, a minimal amount of fragrance-free dish soap, and rinse thoroughly — at least 30 seconds under running water per glass. Do not let glasses air dry rim-down on a flat surface, as water collects and concentrates minerals at the rim line. Use a stemware rack or hold them upside down at an angle.

The Great Soap Debate
Purists will tell you: “Never use soap on a wine glass.” Is this true?
Verdict: Use sparingly, with caution, and rinse obsessively.
Hot water alone is usually sufficient to remove wine residue from a glass. Wine contains water, alcohol, tannins, and pigments — all of which dissolve readily in hot water without detergent. However, if you had a greasy meal (such as a cheese board or a buttery dish), lip oils and food grease can transfer to the rim. In this case, a single drop of fragrance-free dish soap is necessary and appropriate. The critical step is rinsing — rinse each glass under hot running water for a full 30–45 seconds after any soap use. Any soapy residue will suppress bubbles in sparkling wine and alter the aromatics of your next pour.
For casual glassware used frequently, the soap debate matters less. For your best crystal reserved for special bottles, always use hot water alone when possible, and reserve soap for genuine grease situations only.
Hard Water Spots & Cloudy Film: The Complete Fix
Hard water spots are the most common complaint among wine glass owners who clean and polish diligently but still end up with cloudy, spotted results. If you find yourself re-polishing glasses that still look dull, hard water is almost certainly the cause.
What Causes Hard Water Spots?
Hard water contains dissolved minerals — primarily calcium and magnesium carbonates. When water evaporates from a glass surface, these minerals are left behind as a white, chalky deposit. In areas with very hard water, these deposits can build up after just a single wash cycle, making regular polishing feel futile.
Diagnosing Hard Water vs Etching
It is critical to distinguish between these two problems, because only one of them is fixable:
| Symptom | Hard Water Deposits | Etching (Permanent) |
|---|---|---|
| Appearance | White, chalky, spotty | Uniform hazy cloudiness all over |
| Location | Where water pooled or dripped | Entire glass surface evenly |
| Feel | Slightly rough to the touch | Smooth but dull |
| Vinegar test | Spots dissolve and disappear | No change after vinegar |
| Reversible? | Yes — treatable | No — permanent glass damage |
The Vinegar Soak Method (for Hard Water Deposits)
- Fill the glass with a 1:1 mixture of warm white vinegar and warm water.
- Let it soak for 30–60 minutes. For severe buildup, soak overnight.
- Pour out the solution and gently agitate with a soft cloth or sponge.
- Rinse thoroughly with warm water — three full rinses minimum.
- Steam and polish using the standard method above.
Ongoing Prevention: After washing, always rinse glasses with a 1-second splash of white vinegar diluted in water (roughly 1 tablespoon per quart), then rinse with plain water. This neutralizes mineral-heavy tap water before it evaporates on the glass surface and leaves deposits.
Water Softener or Filtered Water
If hard water is a persistent problem in your home, consider a water softener attachment for your kitchen sink. Alternatively, rinsing glasses in filtered or distilled water as a final step before air drying eliminates the mineral deposit problem entirely. This is overkill for everyday glasses but a worthwhile consideration for fine crystal reserved for special occasions.
Etching: Prevention, Diagnosis, and the Sad Truth
Glass etching is a form of permanent surface damage that creates a uniform, hazy, frosted appearance across the entire glass. It is commonly mistaken for cloudiness that can be polished away — but it cannot. Understanding what causes it is the only way to prevent it.
What Causes Etching?
Etching is caused by a chemical reaction between the silica in the glass and either alkaline detergents or very hot water. The reaction literally removes microscopic layers of glass from the surface, creating permanent micro-abrasions that scatter light instead of transmitting it clearly. The most common causes are:
- Too much dishwasher detergent: High alkalinity is the primary cause. Use half the recommended amount.
- Water too hot: Dishwasher cycles above 140°F accelerate the reaction. Use a cooler glass cycle.
- Pre-washing glasses before the dishwasher: Counterintuitively, rinsing glasses before loading them removes the food particles that detergent needs to react with — so the detergent reacts with the glass instead.
- Very soft water combined with standard detergent: Soft water makes detergent more aggressive. Reduce detergent amounts in soft water areas.
- High-phosphate detergents: These are especially aggressive on leaded crystal and thin glass.
Can Etching Be Fixed?
Unfortunately, no. Etching is permanent physical damage to the glass surface. No amount of polishing, vinegar soaking, or commercial glass cleaners will restore clarity once etching has occurred. Prevention is the only strategy. If you invest in quality glassware — whether Zalto, Riedel, or Schott Zwiesel — protecting them from etching with proper washing practices is essential to protecting your investment.
Crystal vs Regular Glass: Does It Change the Polishing Approach?
The distinction between crystal and regular glass is important both for the drinking experience and for care requirements. Understanding the difference helps you calibrate how much care to invest.
Traditional Lead Crystal
Traditional crystal contains lead oxide (typically 24–32%), which gives it extra weight, brilliance, and a characteristic “ring” when tapped. Lead crystal is more susceptible to etching and should never be put in the dishwasher. Hand wash only with minimal soap, and dry immediately. Note that lead crystal should not be used for long-term decanting or storage of acidic wines, as lead can leach into the liquid over extended contact time — use it for serving, not aging.
Lead-Free Crystal
Most modern premium glassware (including Riedel’s Vinum and Veritas lines, Zalto, and Schott Zwiesel’s Tritan crystal) uses lead-free formulations with barium oxide, titanium, or zinc oxide as alternatives. These provide similar brilliance and resonance without the health or leaching concerns. Lead-free crystal is generally more dishwasher-tolerant, though hand washing is still recommended for the finest pieces.
Everyday Glass (Non-Crystal)
Machine-made glass from standard silica — such as typical restaurant stemware — is the most robust. It tolerates dishwasher heat, standard detergents, and rougher handling far better than crystal. It still benefits from proper polishing technique for service, but the risk of damage is considerably lower. If you frequently entertain and need glasses that can handle volume and frequency, everyday glass is the practical choice.
Quick Identification Test: Gently tap the rim of the glass with a fingernail. Crystal produces a clear, resonant ring that fades slowly. Regular glass produces a dull, flat tap sound. The test is not 100% definitive but is a reliable general guide.
Removing Red Wine Stains From Glasses and Decanters
Red wine contains pigments called anthocyanins that bond readily to glass surfaces, particularly in narrow vessels where residue concentrates. A faint pink or purple tint at the bottom of a glass or decanter is one of the most common care challenges for regular wine drinkers.
For Wine Glasses
The key is acting quickly. Fresh red wine residue dissolves easily in warm water with minimal agitation. A wine that has been left to dry in a glass overnight requires more intervention:
- Warm water soak: Fill the glass with warm water and let it soak for 20–30 minutes. This rehydrates dried pigments and makes them easier to remove.
- Salt and ice agitation: Fill the glass with a tablespoon of coarse salt and a handful of small ice cubes. Swirl vigorously — the ice and salt act as a gentle abrasive to scrub the interior without scratching the glass.
- Baking soda paste: Make a paste of baking soda and water, apply gently with a soft cloth to the stained area, let sit for 5 minutes, and rinse thoroughly.
- Commercial wine glass cleaner tablets: Effervescent tablets designed for decanters work equally well for badly stained glasses — fill with warm water, drop in a tablet, and let it fizz for the recommended time.
For Decanters and Carafes
The narrow neck and wide base of a decanter make it impossible to clean with a standard cloth. Our comprehensive guide on easy wine decanter cleaning covers every method in detail. The most effective approaches include stainless steel cleaning beads swirled in warm water, and specialized decanter cleaning brushes with flexible necks. Never use rice as a cleaning abrasive — it can leave starch residue and is less effective than purpose-built cleaning tools.
Preventing Stains
The most effective anti-stain strategy is the simplest: rinse glasses immediately after use, before the wine has a chance to dry and oxidize against the glass surface. A 10-second rinse right after serving eliminates 90% of stubborn staining problems before they begin.
How Often Should You Polish Wine Glasses?
This is a practical question with a practical answer: polish your glasses every time before serving, not as part of the washing routine. This approach reflects how professional sommeliers and restaurant service teams think about glassware care.
The Two-Phase Approach
Think of glassware care as two separate processes with different goals:
Phase 1 — Cleaning (after use): Washing, rinsing, and drying. This removes wine residue, oils, and biological matter. Done immediately after use or at the end of an evening. Thorough rinsing matters more than perfect results here.
Phase 2 — Polishing (before service): The steam-and-cloth routine. Done 10–15 minutes before guests arrive or before setting the table. This removes any water spots, dust, or storage odors that accumulated since the last use.
Frequency Guide by Occasion
| Occasion | Polish Frequency | Notes |
|---|---|---|
| Everyday casual drinking | Weekly or as needed | A quick buff with a clean microfiber before pouring is sufficient |
| Dinner party (standard) | Same day as event | Full steam-and-cloth method 30–60 min before guests arrive |
| Fine wine tasting | Immediately before pouring | Polish each glass individually immediately before use |
| Glasses in storage (1+ month) | Before any use | Always re-polish glasses that have been stored — dust and cabinet odors are invisible but affect flavor |
| Restaurant service | Every service session | Professional standard: every glass polished during pre-service setup |
The Restaurant Pre-Service Polishing Routine
If you want to elevate your home wine service to a professional level, adopt the pre-service routine that sommeliers and service staff use in fine dining establishments. It takes 15–20 minutes and transforms the entire experience of pouring wine for guests.
The Professional Setup
Professional polishing stations use a consistent layout: a kettle of boiling water on one side, a clean, flat surface in the middle for staging polished glasses, and an area for unpolished glasses on the other side. The entire operation flows from dirty side to steam to clean surface — never backward.
Step-by-Step Pre-Service Routine
- Gather all glasses to be used for the evening. Count them — you need one per guest per wine course, plus backups.
- Inspect each glass before steaming. Glasses with chips or cracks are removed immediately — a cracked glass can shatter during temperature change from steam.
- Bring the kettle to a full boil and maintain it. Have your two polishing cloths ready — one for holding, one for polishing.
- Steam, hold, and polish each glass using the full 7-step steam method above. Work through the stack systematically.
- Hold polished glasses by the stem or base only, never by the bowl, as you move them to the table. A freshly polished bowl touched bare-handed needs immediate re-polishing.
- Place glasses on the table upside down on a clean cloth if you are setting the table more than 30 minutes before service. This prevents dust settling inside the bowl during the wait.
- Flip glasses right-side up and do a final visual check as guests arrive. Turn the glass slowly in the light to check for any remaining spots.
The Sommelier’s Secret: The reason glasses in top restaurants always look perfect is not that the glasses are more expensive — it is that they are polished again, from scratch, at the start of every single service. Adopt this habit at home and the difference will be immediately visible.
For more on building a complete wine hosting setup at home, our guide on wine accessories every host needs covers everything from openers and decanters to preservation tools and serving trays. Also see our top wine accessory gift picks if you are shopping for a fellow enthusiast.
Handling & Safety Tips
Most glasses break during the drying and polishing process, not during drinking. A small number of technique adjustments eliminate the vast majority of polishing-related breakages.
- Remove all jewelry before washing and polishing. Diamond rings and hard-stone rings can scratch crystal or catch on a delicate rim, causing catastrophic cracks.
- Hold by the bowl when polishing the bowl. When your cloth hand cradles the bowl, you are distributing pressure across the widest, strongest area of the glass.
- Never hold the base and rotate the bowl. The torque travels through the stem — the weakest point — and snaps it. Always move base and bowl in the same direction together.
- One glass at a time, always. Never hold multiple glasses by the stems between your fingers (the “claw grip”) during washing or drying. One small slip drops all of them.
- Do not rush the steam step. Thermal shock — moving a cold glass directly into steam — can cause micro-cracks. Let the glass warm slightly to room temperature before steaming if it has been in cold storage.
- Place glasses on a folded cloth, not a hard surface. Setting a freshly polished glass down on a hard counter creates a contact point stress — a cloth provides a slight cushion and reduces this risk.
Storage to Keep Glasses Clean Longer
The way you store glasses between uses determines how much polishing work you need to do before the next service. Smart storage dramatically reduces pre-service preparation time.
Upright vs Inverted — The Ongoing Debate
The sommelier community is divided on this question, and both sides have valid points:
Store upright: Prevents stale, musty air from being trapped inside the bowl. The interior of an inverted glass never gets fresh air circulation, and over weeks, a distinctive “glass cabinet” smell develops that affects the first pour of wine. Upright glasses breathe freely. The downside: dust can settle inside the bowl.
Store inverted: Protects the interior from dust accumulation. The rim is on a soft cloth or rack, which is safe if the surface is clean and level. The downside: the trapped air inside can develop mustiness over time.
Our recommendation: Store upright in a closed cabinet. The closed cabinet prevents dust accumulation, and the upright orientation prevents musty odors. Give glasses a quick pre-service polish regardless of storage method — it takes one minute and guarantees perfect results.
Closed Cabinet Storage
A closed cabinet away from heat sources (the stove, dishwasher exhaust) and strong odors (spices, cleaning products) is the ideal storage environment. Grease from cooking can drift onto glasses stored near the stove and is very difficult to remove without soap, creating a cleaning challenge before every dinner party.
Under-Cabinet Stemware Racks
Under-cabinet racks that hold glasses inverted from their bases are a popular and space-efficient solution. They keep glasses off shelves entirely, reducing dust exposure and eliminating stacking risks. The glasses hang safely and are easy to retrieve one at a time. The main drawback is the musty-air issue mentioned above, which a brief pre-service rinse or steam easily resolves.
For more on organizing your complete wine setup at home, check out our guide on wine cellar essentials: racks, climate, and lighting.

The Complete Glass-to-Bottle Experience
Polishing is the final step in a chain of decisions that determines how good a wine tastes in your glass. The glass shape, the wine’s age and structure, how it is opened, and whether it is decanted all play interconnected roles. Here is how polishing fits into the broader picture.
Choosing the Right Glass First
A perfectly polished glass of the wrong shape still delivers a suboptimal experience. The glass’s bowl shape, rim diameter, and stem height all affect how wine aromas develop and reach your nose. A Bordeaux-shaped glass concentrates bold red aromas differently than a wide Burgundy bowl. Matching glass to grape variety is as important as temperature and polishing. Our guide to top red wine glass picks by variety helps you match glass to bottle for every occasion.
The Decanting Connection
Many wines benefit from decanting before being poured into your freshly polished glass. Young reds with high tannins open up dramatically with 30–60 minutes of aeration in a decanter. The beauty of a perfectly polished glass is fully appreciated when the wine that fills it is equally well-prepared. Our guide to when and how to decant wine completes the serving picture. For choosing a decanter, see our decanter shape and material comparison.
Serving Temperature
Even the most perfectly polished glass cannot compensate for wine served at the wrong temperature. Reds served too warm taste flat and alcoholic; whites served too cold taste muted and closed. Our top electric wine chiller picks and best wine chiller sleeve guide cover your temperature-control options at the table.